Georeference a Map
About This Tutorial
Section titled “About This Tutorial”Note for Instructors
Introduction
Section titled “Introduction”Georeferencing is a commonly used tool to accurately digitize data on a paper map. It uses a series of control points in the digital image to associate this image with spatial locations. The digital image could be an aerial photograph, a scanned map, or a picture of a topographic map. The georeferenced map can be used for basic map analysis, such as calculating distances and areas. In this tutorial, you will learn how to georeference a historical map by using ArcGIS Pro.
Download Data
Section titled “Download Data”-
Visit the BTAA Geoportal and search with the keywords
Hyde Park Community. -
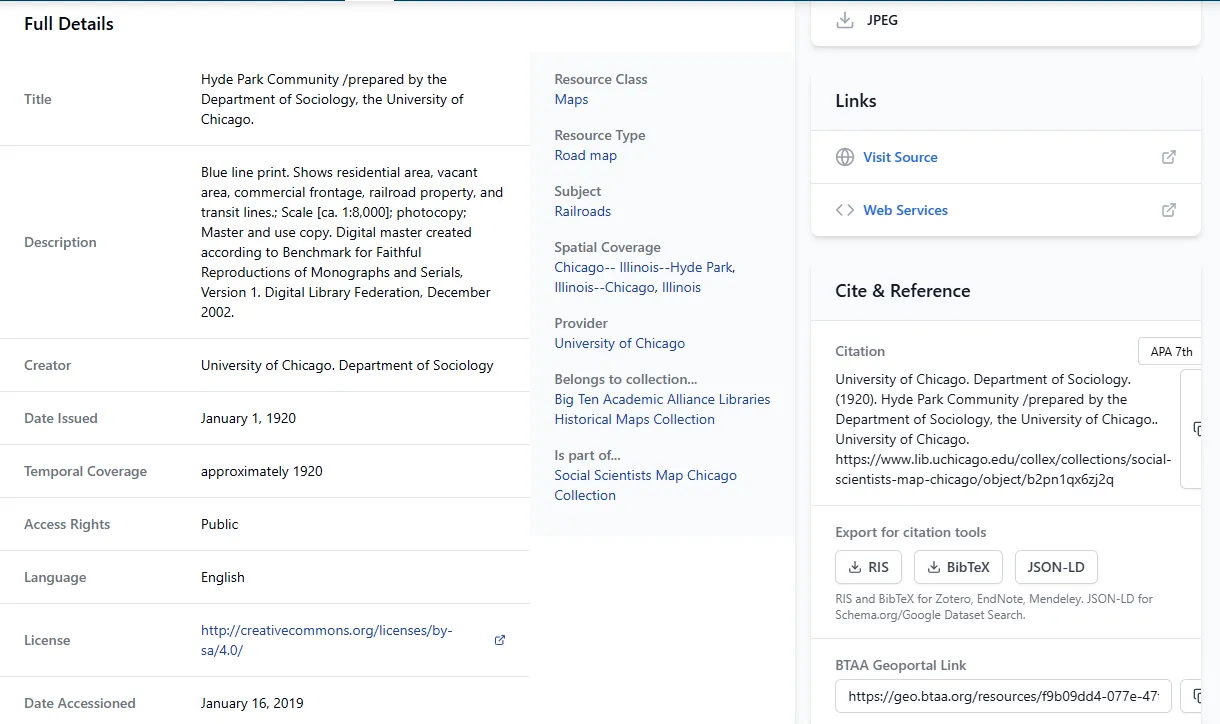
Open the result titled “Hyde Park Community /prepared by the Department of Sociology, the University of Chicago.”
-
Click the down arrow at the top right of the image preview box and select a resolution to download.
-
Right click the map and save the image as “G4104-C6-2H9-1920z-U5.jpg”
Data Processing
Section titled “Data Processing”-
Open ArcGIS Pro
-
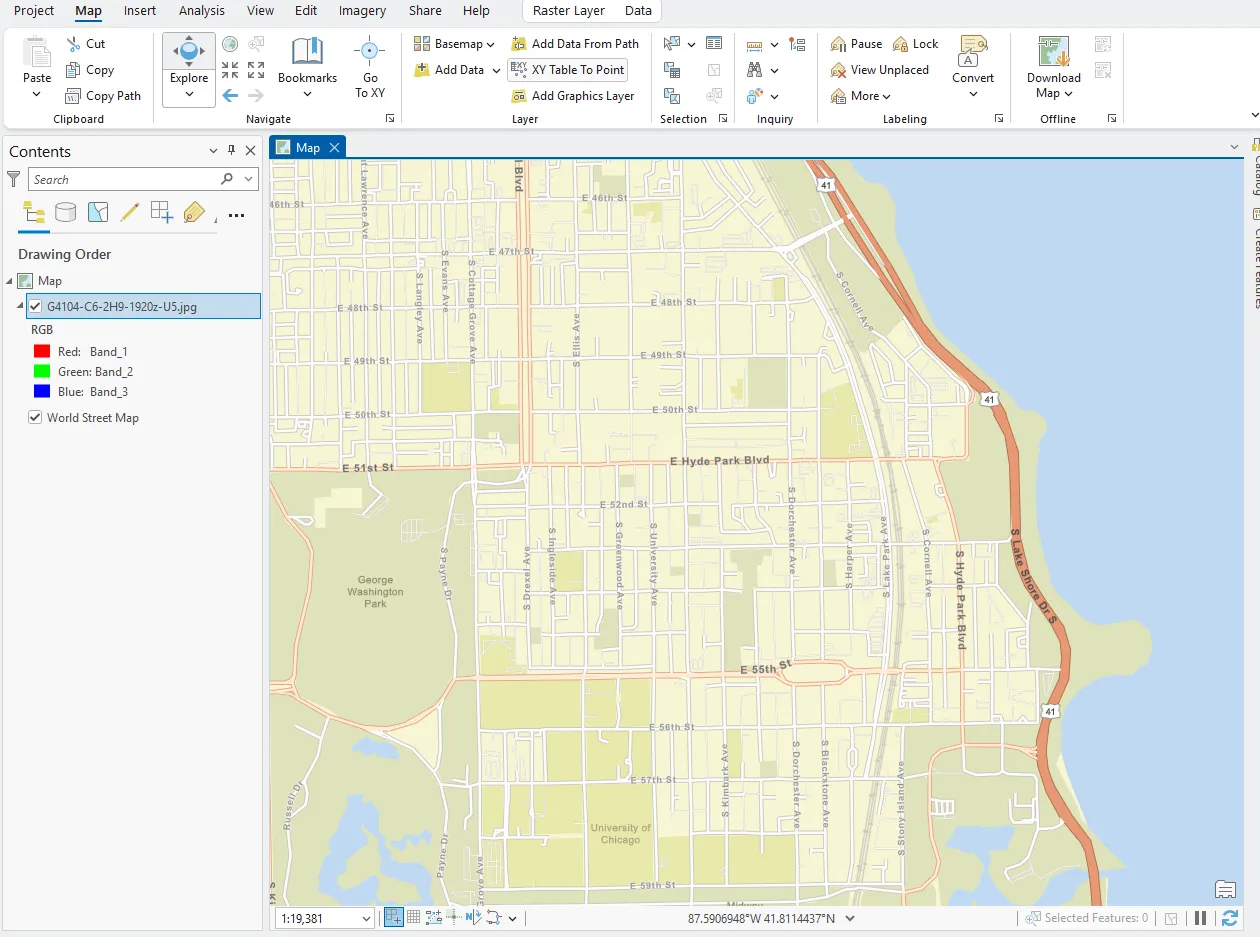
Click Add Basemap and choose Streets map
-
Zoom in to the study area: Hyde Park, Chicago, Illinois
-
Click Add Data and choose the image “G4104-C6-2H9-1920z-U5.jpg”
-
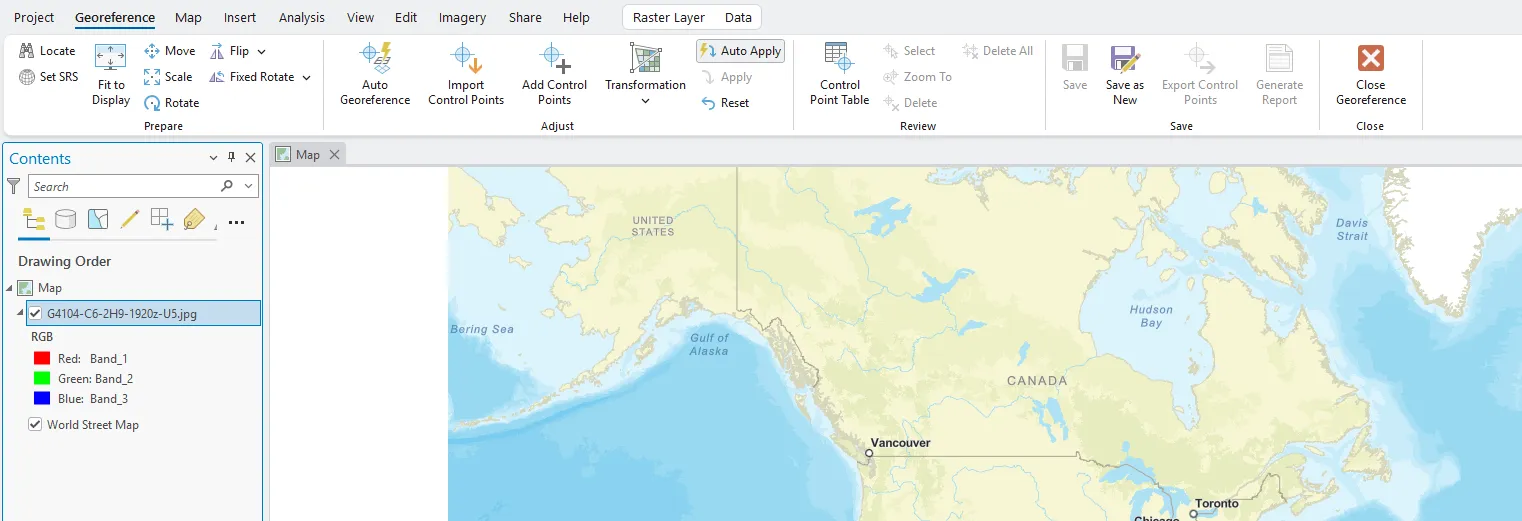
Click Imagery and Georeference.
-
Click Fit To Display to show the image in the study area.
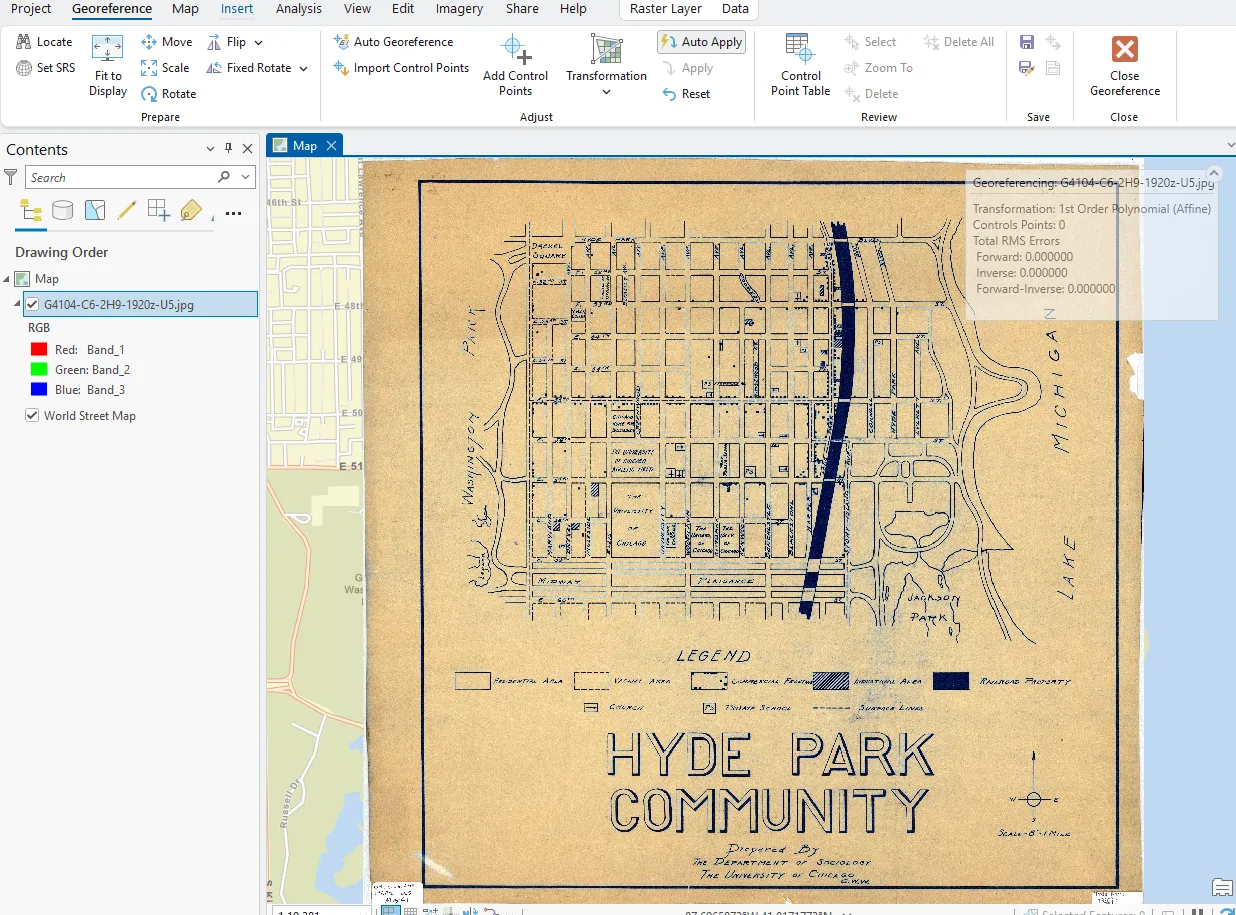
-
Right click Layers -> Properties and select WGS_1984_Web_Mercator_Auxiliary_Sphere as the coordinate system.
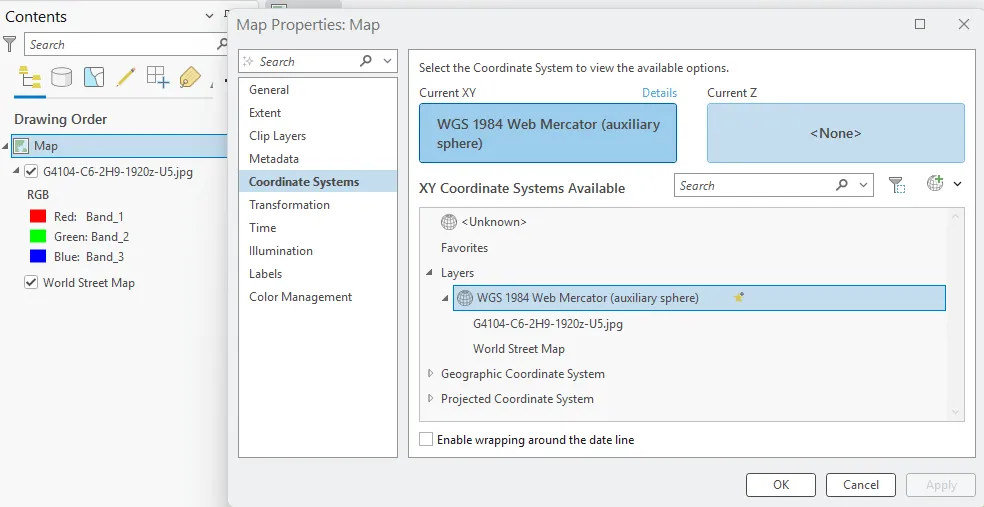
-
Explore ways to navigate the map by clicking View and Navigator, if not turned on previously.
-
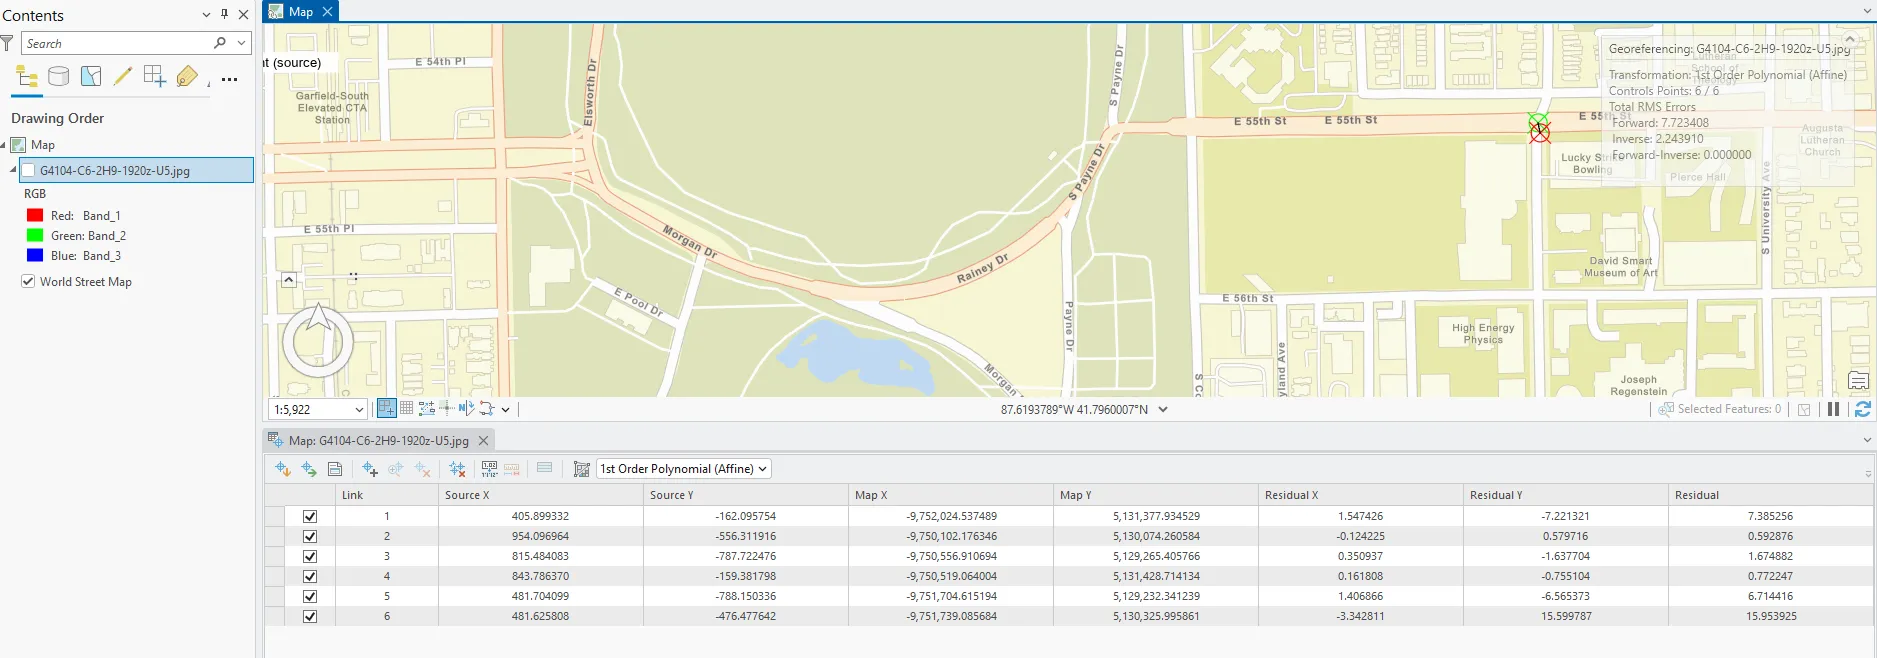
Click Add Control Points to select control points. Select control points from the scanned map and then choose the corresponding location on the street map.
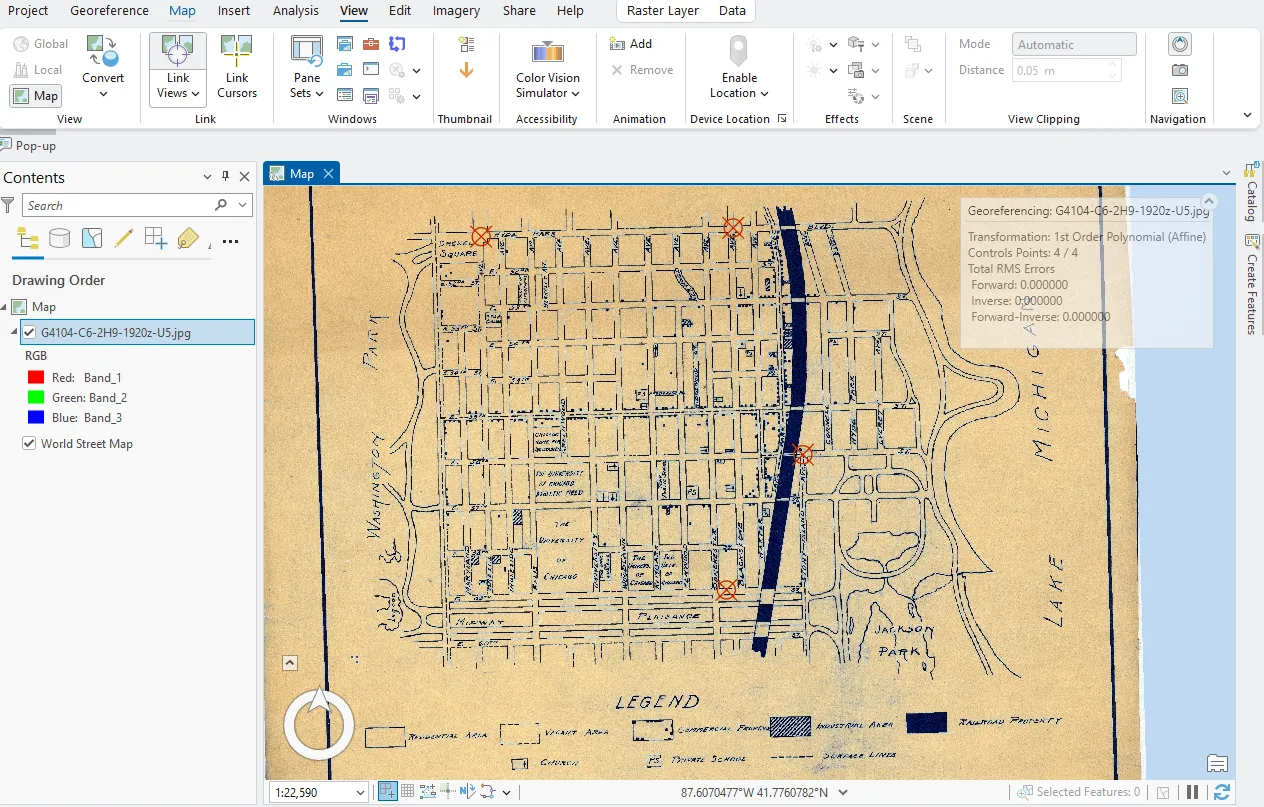
-
Select control points in the area close to the four corners of the map.
-
Select additional control points. The more points you assign the more accurate your georeferenced map will be.
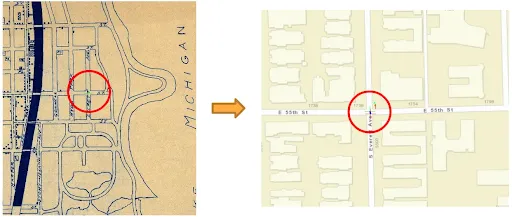
-
Click View Link Table. It is up to you to determine the acceptable residual values. If a link has a residual value much larger than others, the link should be deleted.
-
After georeferencing, click Save to save the result.
-
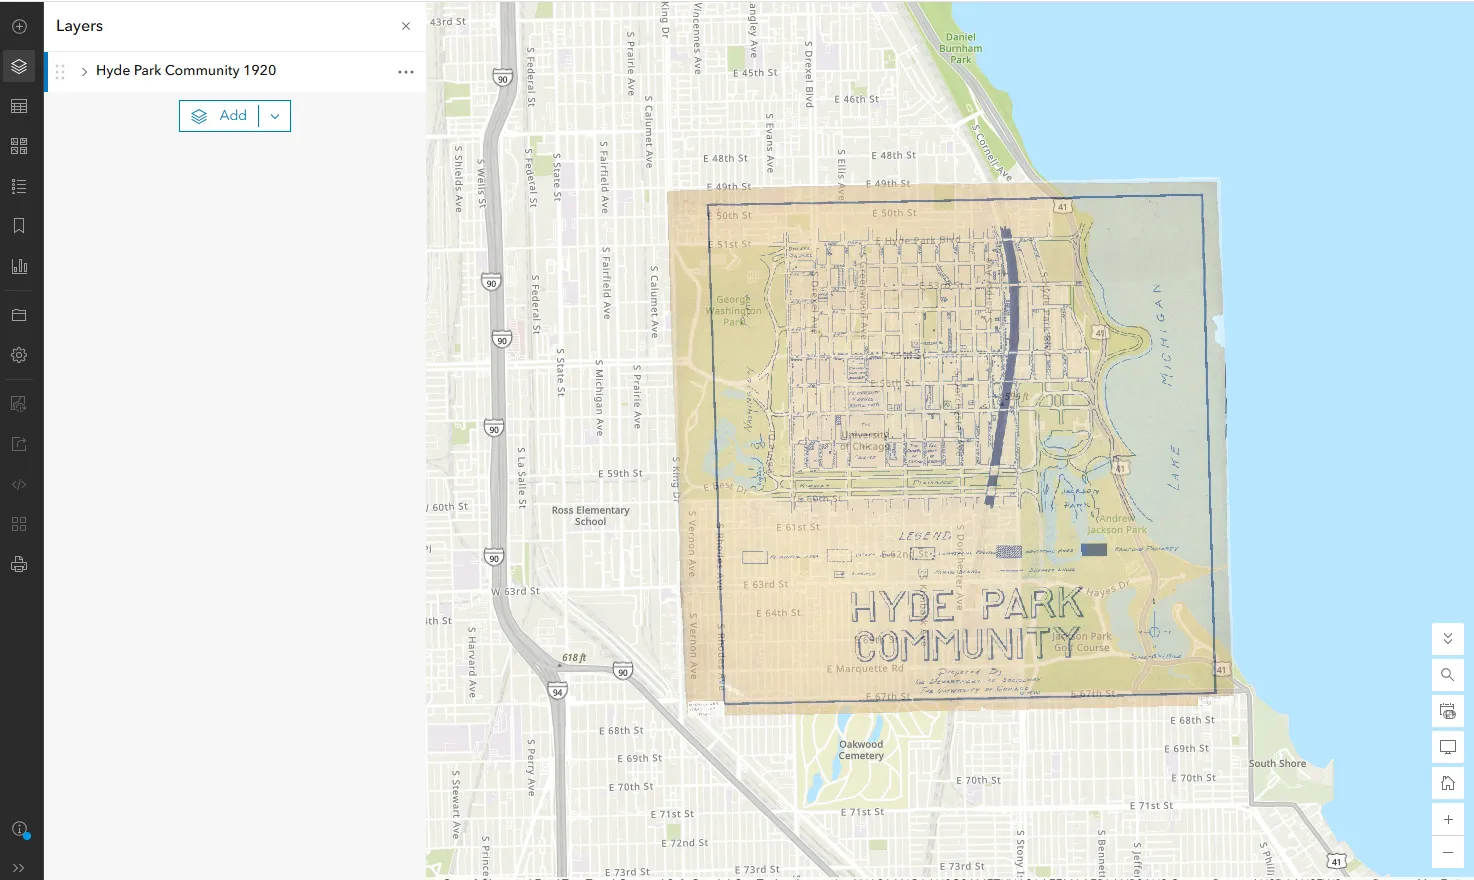
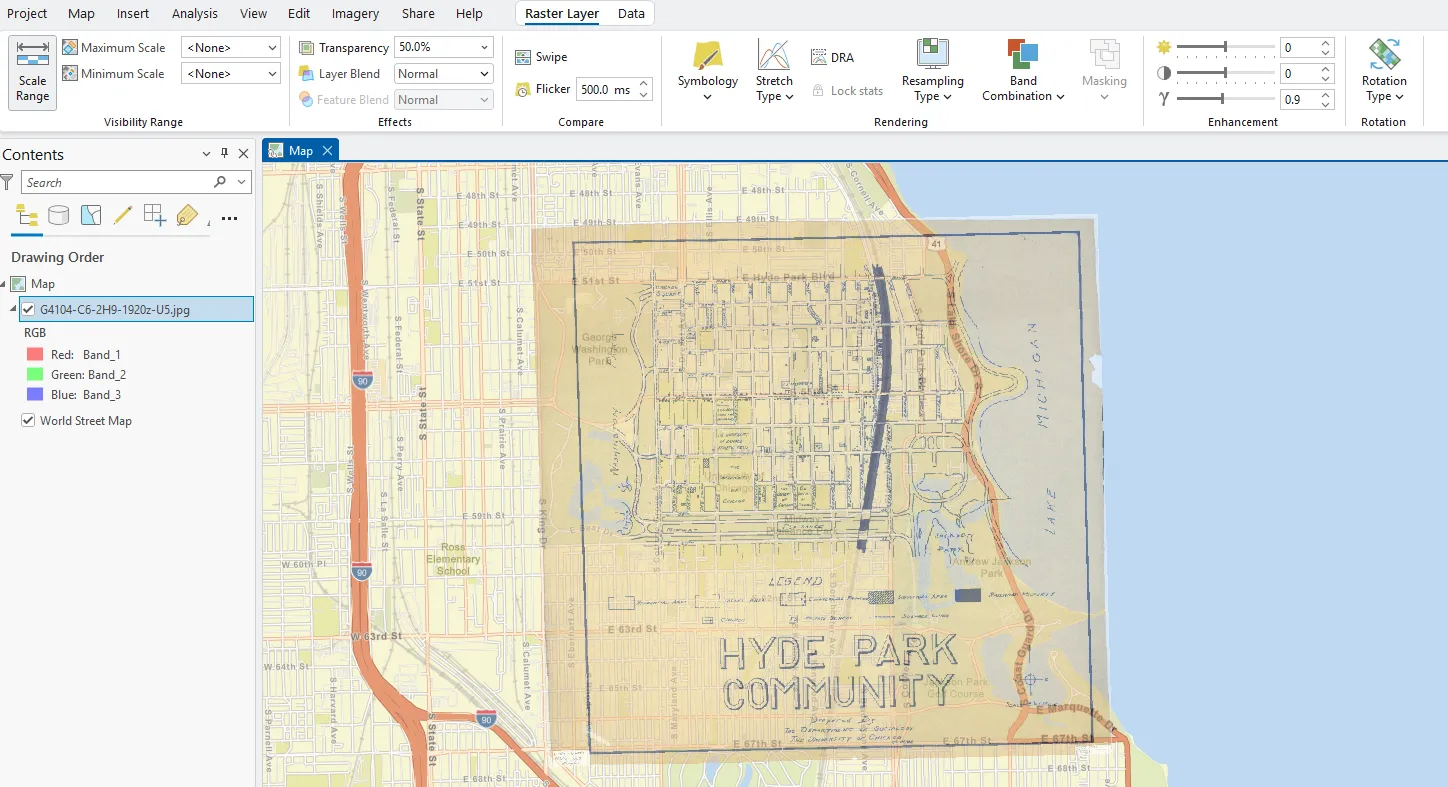
Click Raster Layer, change transparency to 50%. It is now easier to compare the georeferenced map locations with the real world locations.
Publish the Map on ArcGIS Online
Section titled “Publish the Map on ArcGIS Online”This topic is optional. To publish a hosted layer, you will need publishing privileges in your ArcGIS organizational account.
Publishing a tiled service to ArcGIS Online will consume credits, which are the currency used across ArcGIS. To estimate how many credits you will need to perform specific transactions or store data, you can refer to this website: https://doc.arcgis.com/en/arcgis-online/administer/credits.htm
-
Sign in with your university account.
-
Remove Basemap
-
Click Share, Web Layer, then Publish Web Layer

-
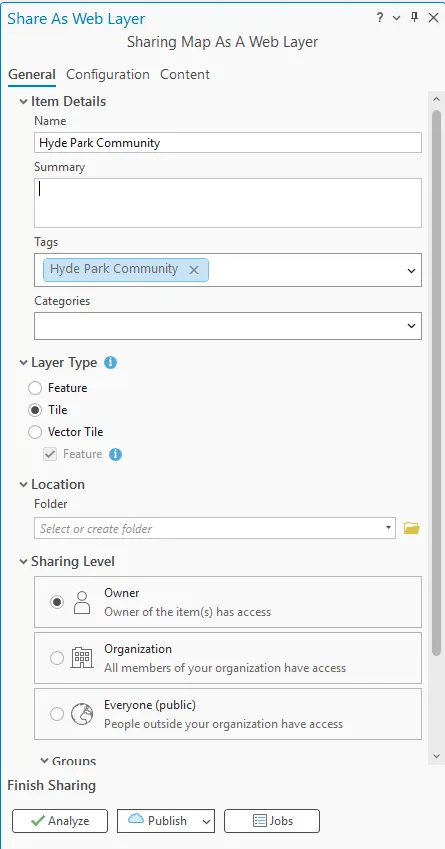
Enter information for Item details. For Layer type, select Tile.
-
Select appropriate levels of detail. Do not choose extreme large cashe size, which may consume all your credits.
-
Click the Publish button to publish this service.
-
View map in ArcGIS Online